Like every mum we love to take pictures of our little ones so here I have pointed some great tips for you to take better pictures with your phone
7 Tips How to take better photos with your iPhone
1-Before you take the shot, check the scene for any distracting elements.
Move closer, or change your viewpoint, to remove unwanted objects from your photo(poles, trees..). Nowadays it’s so easy to get distracted by everything and it’s such a challenge to stay focused. The same goes for the photos: keep in mind that the more subjects you have the more confusing it might get.
Sometimes it’s best to keep it simple and minimalistic by eliminating all the distractions on your iPhone screen when composing your photo.If you include only one main subject in your shot on a plain, or un-distracting background, that could make a powerful impression on the viewer.It could also ensure that your image is easily remembered .

2-Shoot from a different angle
An easy way to improve your photos is to shoot from a different prespective. Often the best way to do that is to shoot from a lower angle.
There are three great reasons to take pictures from a low angle. First, your photo will be more intriguing. It shows the world from a new perspective.
Second, shooting from a lower angle shows your subject with nothing but sky in the background. This is perfect for removing unwanted distractions. It makes your subject stand out against the plain background.
A third benefit of shooting from low down is that you can show interesting details in the foreground.
For the ultimate low angle shot, try kneeling or even lying on the ground!

3-Snap photos with the volume button
Because the iPhone is so thin, tapping the digital shutter button can cause camera shake and blur the photo you’re trying to take. Instead, you can use the volume up button when in the Camera app to snap a photo — and avoid camera shake entirely.
4- Turn off your flash
Recent generations of the iPhone flash are much improved upon their predecessors, but at the end of the day, the flash is still just an LED light: It’s just not that powerful, and even with the TrueTone technology it can occasionally emit a strange hue onto your photographs.
Instead, try shooting in natural lighting sources, or if you’re shooting at night, use the Camera app’s exposure slider to boost light in the photo.

5-Get perfect focus with manual override
Even if you make sure that your lens is clean in advance and there’s no camera shake, the photo might still look a bit off. One possible reason for that could be that your phone didn’t focus on the right place.
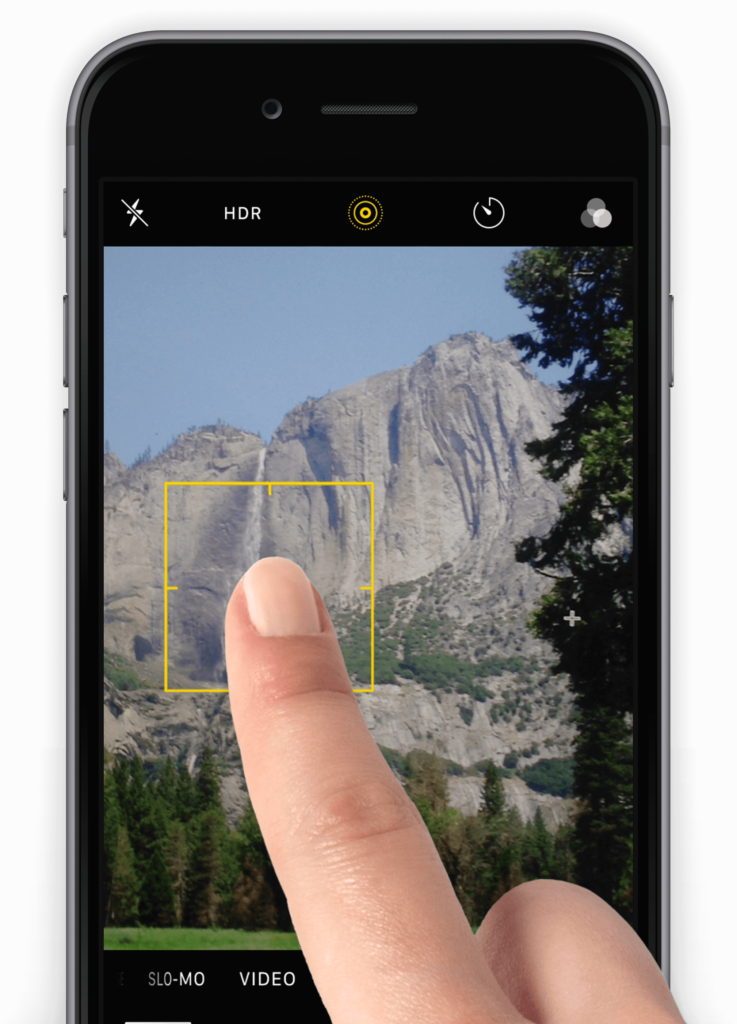
To prevent this from happening, did you know you can actually select your focus point manually?
Just tap on the screen where you want it to appear. You’ll be able to see the outlines of a yellow square when you tap, to show you that you’ve set the focus on the right place.

6-Lock your focus for sharper subjects
Now you know how to set your focus point manually using the above iPhone photography tip, but there are some instances where this won’t work.
For example, if there’s movement in the scene, the camera might be constantly readjusting the focus point to compensate for the subject’s new position.
To overcome this, did you know you can ‘lock’ your focus? Next time, just tap on your subject on the camera screen, and hold your finger down for a couple of seconds – you’ll see ‘AE/AF Lock’ appear.
You can either swipe your finger up/down the screen to adjust exposure, or simple tap the shutter button to take the shot.
The focus lock will remain until you exit the camera app, or turn off your phone.

7-“Frame” your image to draw attention


This tip can be applied not only to iphone photography but to most types of visual art in general. It’s basically creating a frame within the frame that’s already defined by your photo itself.
To create this inner frame you can use any element of the scene you’re shooting. It could be the branches of a tree pointing to your subject, pulled back curtains, an open door or a window.
Framing draws the attention of the viewer right to the subject of your photograph and it also creates a “layered” effect which saves the photo from looking flat and unexciting.
Now that I have given you all this amazing tips! Go and capture beautiful pics of your family!
I’m Chani from Chani Spiro Photography, I specialise in Newborn & Family Portraiture
Serving Newcastle, Durham, Ponteland, Low Fell – North East Uk
And I love creating for my clients Wall Art and products to be cherished for a lifetime!
www.cspirophotography.com
